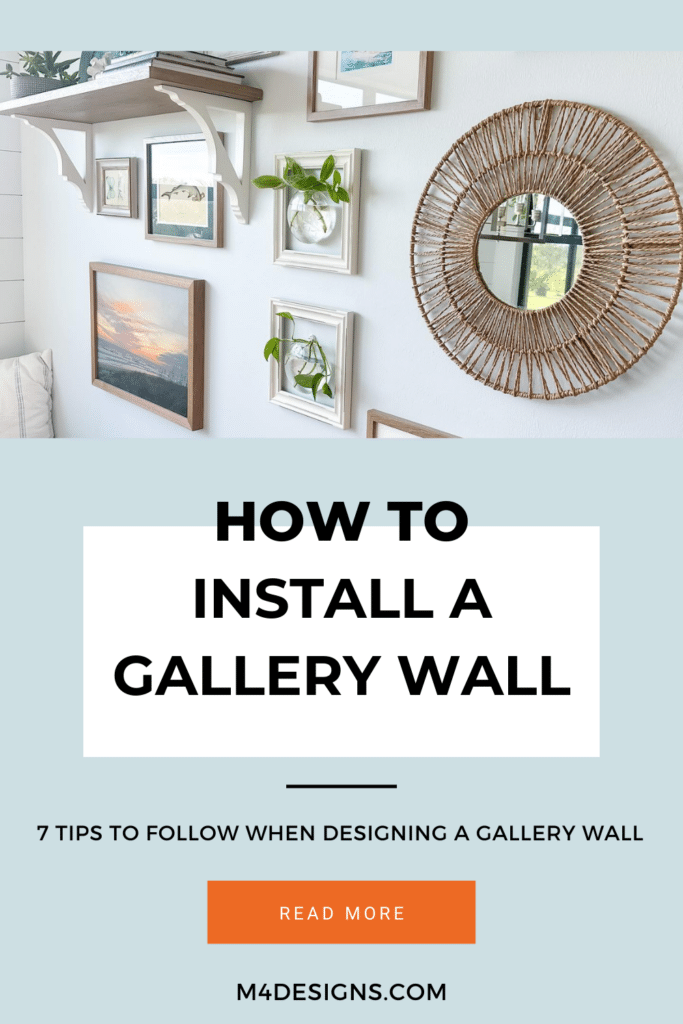
Designing and installing a gallery wall can be a fun and exciting project that can transform the look and feel of your home. A well-curated gallery wall can add a personal touch to your space and showcase your unique style. However, it can be a daunting task to create a cohesive and aesthetically pleasing arrangement. Below I will provide you with tips on how to design and install a gallery wall in your home.
Supplies For Installing a Gallery Wall:
Level
Nails and Anchors
Hammer
Frames
Roll of butcher paper
Blue Tape
7 Tips to Follow when Installing a Gallery Wall
1. Choose a theme or color scheme
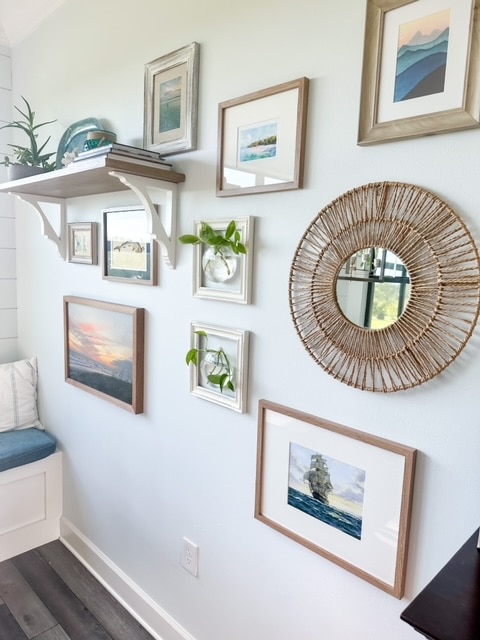
Before you start hanging pictures, it’s important to choose a theme or color scheme for your gallery wall. This will help you create a cohesive and visually appealing display. Some popular themes include family photos, travel, nature, or art. At times I also like to do a mixture of all of them. If you choose to do a mixture make sure that each piece has a meaning or coordinates with each other.
If you look at my gallery walls each piece has some special meaning. It might be a place we have been, a photo we have taken or the Hammerhead is because our family loves sharks. Once you have chosen a theme, select pictures that fit within that theme and consider the colors in the photos and art. This will help you select frames and matting that complement your pictures.
2. Mix and match
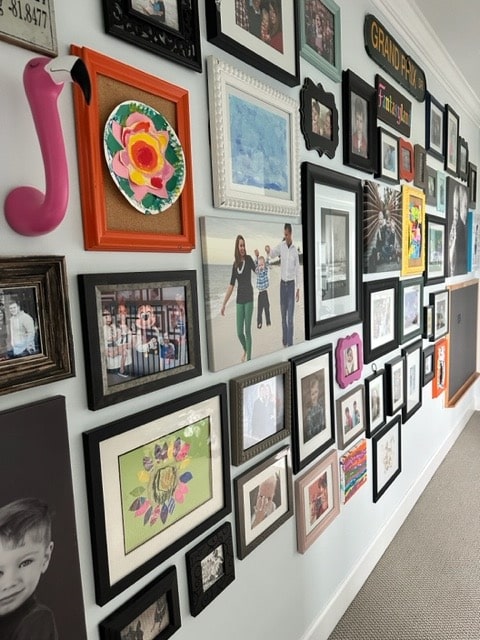
Mixing and matching frame styles is a great way to add visual interest to your gallery wall. You can choose frames in different colors, textures, and sizes to create a unique display. However, it’s important to maintain some consistency to ensure that your gallery wall looks cohesive. For example, you could choose frames in the same color but with different textures or select frames of the same size but in different colors.
3. Incorporate different types of art
In addition to photographs, you can incorporate different types of art into your gallery wall such as paintings, prints, and posters. This will add dimension and texture to your display. You can also consider adding decorative objects such as mirrors, baskets, plates or shelves to break up the pictures and add visual interest. If you decide to add other elements make sure the style blends well with your photos and colors. Please do not hang a photo of a cow and hang a seashell next to it.
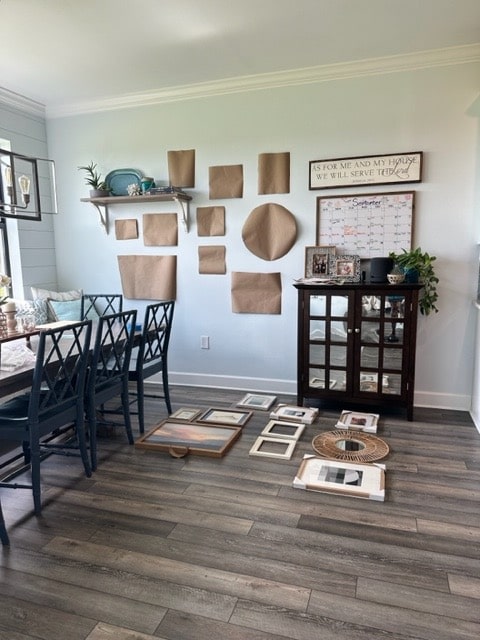
4. Plan the layout
The next step is to plan the layout of your gallery wall. Once you have determined the wall and size of the space on the wall, start arranging your pictures on the floor. This will give you an idea of how the pictures will look on the wall and allow you to make adjustments before hanging. Next step is to map out the space on the wall where you want to hang your pictures. You can do this by using painter’s tape, cut our paper to the size of each item or by drawing a rough sketch of the wall. This will give you a great opportunity to play with the layout.
5. Consider the spacing
When hanging your pictures, it’s important to consider the spacing between them. The spacing should be consistent throughout the gallery wall and should be proportional to the size of the pictures. A general rule of thumb is to keep the spacing between pictures 3 to 6 inches. But also know it is okay if you have to space it out more to make certain pieces work as long as they are all consistent.
6. Use a level and measuring tape
To ensure that your gallery wall is level and properly spaced, use a level and measuring tape. This will help you create a professional-looking display and prevent any crooked pictures or uneven spacing.
7. Hang the pictures
Finally you have planned out your gallery wall, it’s time to hang the pictures. Start by hanging the largest picture in the center of the wall and work your way outwards. Sometimes you will not have the largest piece in the center and that is okay but start with the picture that you want the most focus on. Use a hammer and nails or picture hanging strips to secure the pictures to the wall. Make sure to hang the pictures at the correct height and use a level to ensure that they are straight.
Designing and installing a gallery wall in your home can be a great way to show off your personality, family and display items that are special to you. Hopefully by following these tips, you can create a cohesive and visually appealing display that you will love. Remember to choose a theme or color scheme, plan the layout, mix and match, consider the spacing, incorporate different types of art, use a level and measuring tape, and hang the pictures properly. Check out my Instagram and “Friday Finds” for inspiration items for your walls. With a little bit of creativity and patience, you can transform any wall into a stunning gallery display.